
Multiburst UDP traffic
| Introduction | An internet stream isn't always a perfect flow of bits at a constant rate. So for your tests, you want to create such a burst flow. This article describes how you can simulate a UDP flow with burst using our GUI. If you are familiar with the Byteblower GUI and with using Frame Blasting skip to Configure MultiBurst Frame section below to learn how to create bursty traffic. |
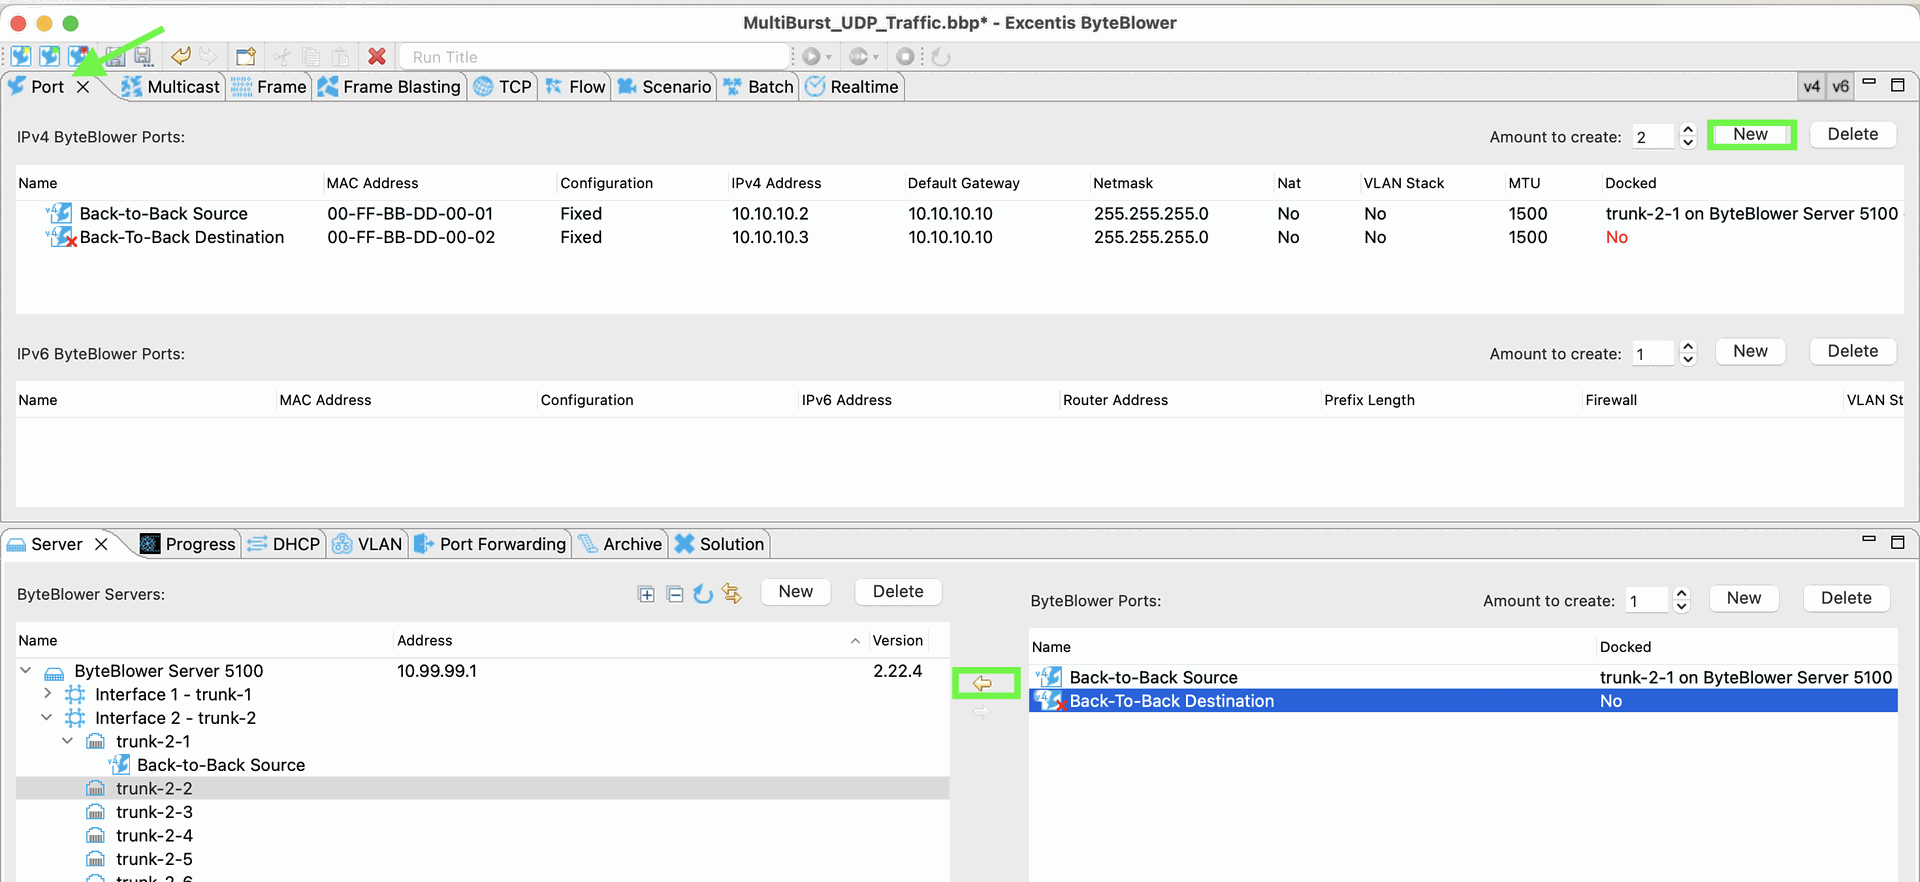
| Creating/Docking Ports | To create a multi-burst UDP flow we start with the basic components: From the Port Tab a source port and a destination port are created. We provide them with a correct MAC, IP address, Default Gateway, Netmask and dock the ports on our server. All these columns can be configured depending on your test and network setup. We will use IPv4 ports in this example however this is also possible with IPv6 ports.
To dock your ports: From the Server Tab (bottom left) select the Interface and the Port you wish to dock there and use the yellow arrow or drag and drop the Byteblower Port to the intended Interface. |
| Creating a Frame | Next, from the Frame Tab we create a frame we want to transmit. We give this frame our desired size and if needed the wanted UDP source/destination port numbers. In our example we will use a frame of 128 bytes.
Only the Name and Frame size was edited here, however Layer 2, Layer 3, and Layer 4 on a frame can be edited if needed for your test case. For example to mark |

| Configure MultiBurst Frame | It is now in the Frame Blasting Tab that we will define the speed and the burstiness of our flow.
Create a new template and add the frame (our frame of 128 bytes created in the previous step). With the edit button in the middle plane, we can configure the speed and add a timing modifier. It is this timing modifier that creates the burst profile.
Under the Speed tab, we configure the speed of the flow. Let's configure this to a UDP flow of 2Mbit/s. The Timing Modifier tab allows us to add a time modifier to the flow to create a burst profile. Here we can configure 2 parameters.
Interburst Gap: this is the time between 2 bursts. During this period no frames will be transmitted Frames per Burst: How many frames need to be transmitted during a burst |


| Flow Tab | In the Flow tab, we connect the source, destination, and the frame blasting template together to create our flow. We can use this Flow now in the Scenario Tab.
|


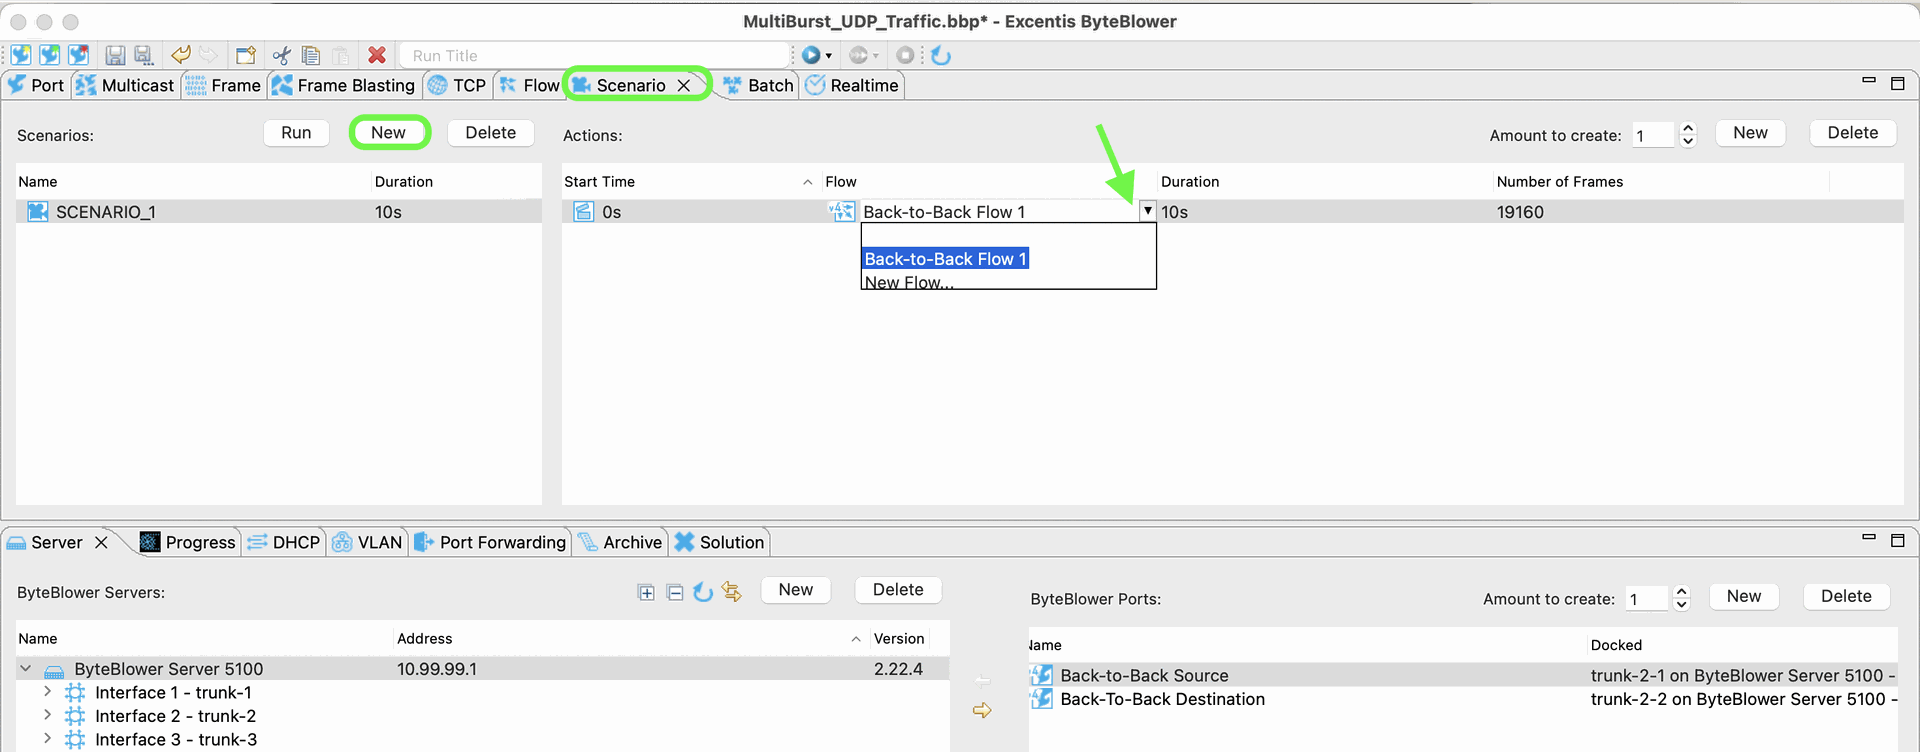
| Scenario Tab | In the Scenario Tab we add the Flow previously created (Back-to-Back Flow 1). Provide here the duration wanted for the flow or define the number of frames you want to transmit, the GUI will then calculate the duration.
We are now ready to run the project by clicking on Run |
| Results | Below you see the result report showing the bursts.
|

Here is the sample project file. You will still have to dock the ports to your servers interface.