
A brief overview of the Test parameters
| Introduction | This section will give a brief explanation of some of the tabs in the GUI. This example project has already filled these in for you to make the test easy to run. |
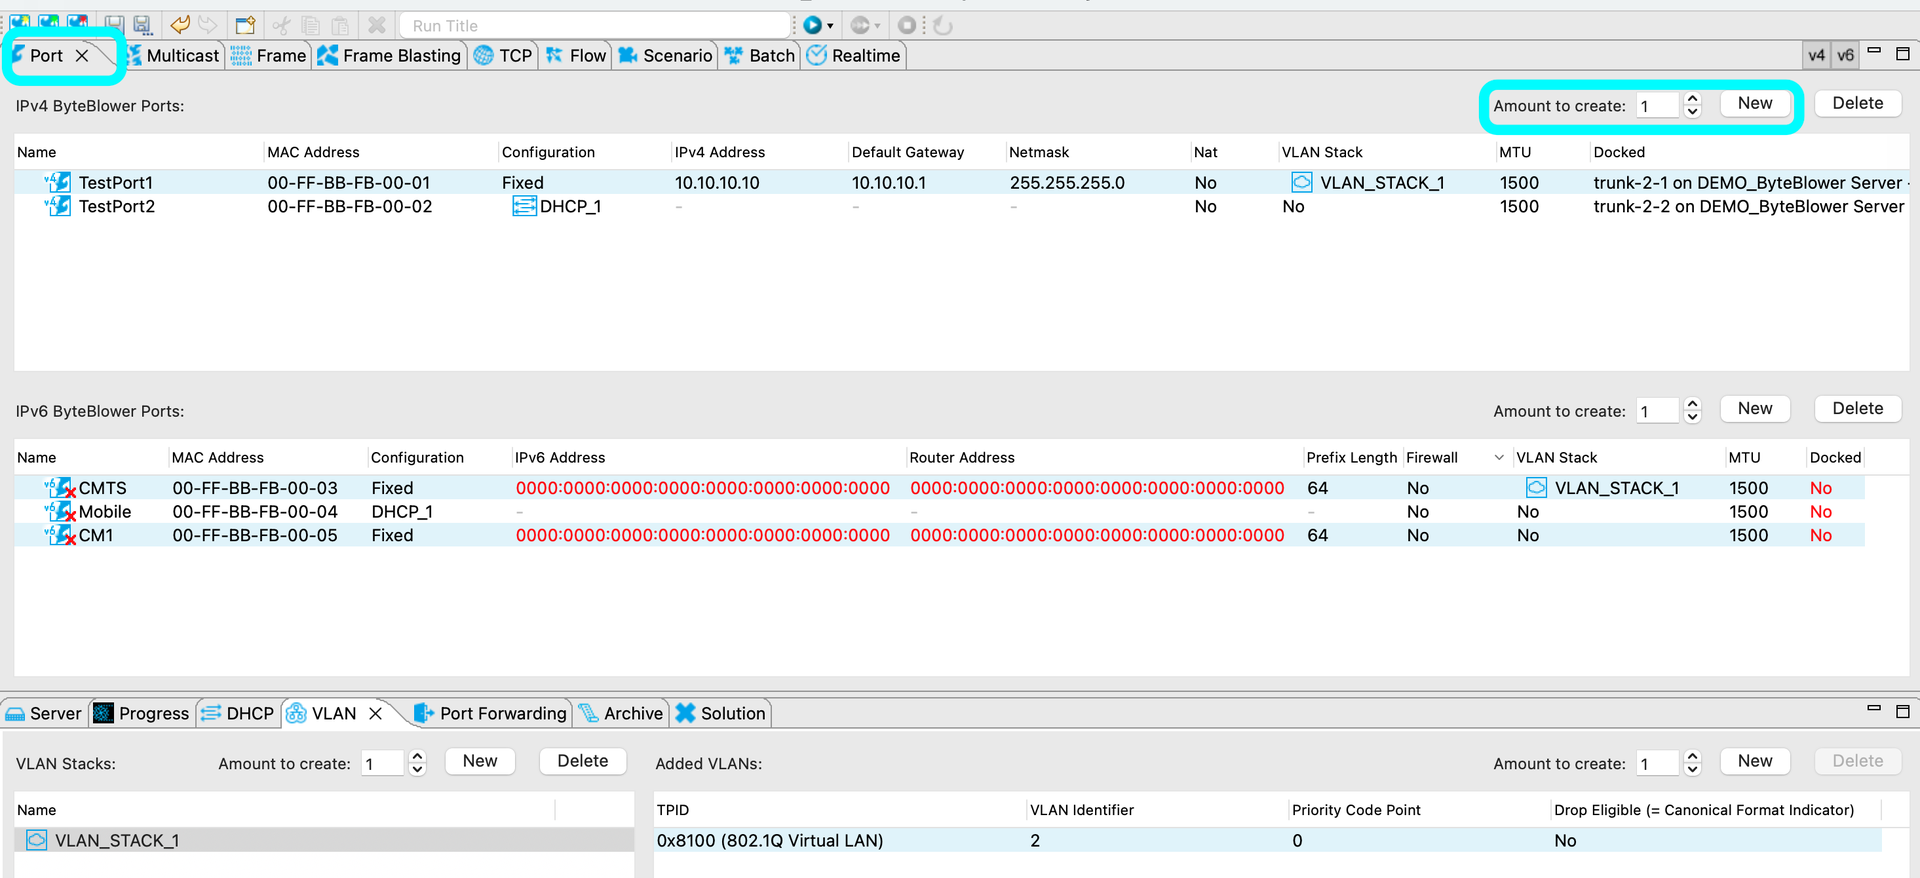
Port Tab | The Port Tab. Here you will create IPv4 and/or IPv6 addresses. These will be the transmitters/ receivers of the test traffic configured in the later steps. In this tab, you can configure the following:
|
Frame Tab | Creates a data frame.
|

| Frame Blasting Template | Frame blasting flows create a repeating flow of frames with a size determined in the previous step (1024).
|

| Flow | The source and destination of the frame blast are chosen here.
|
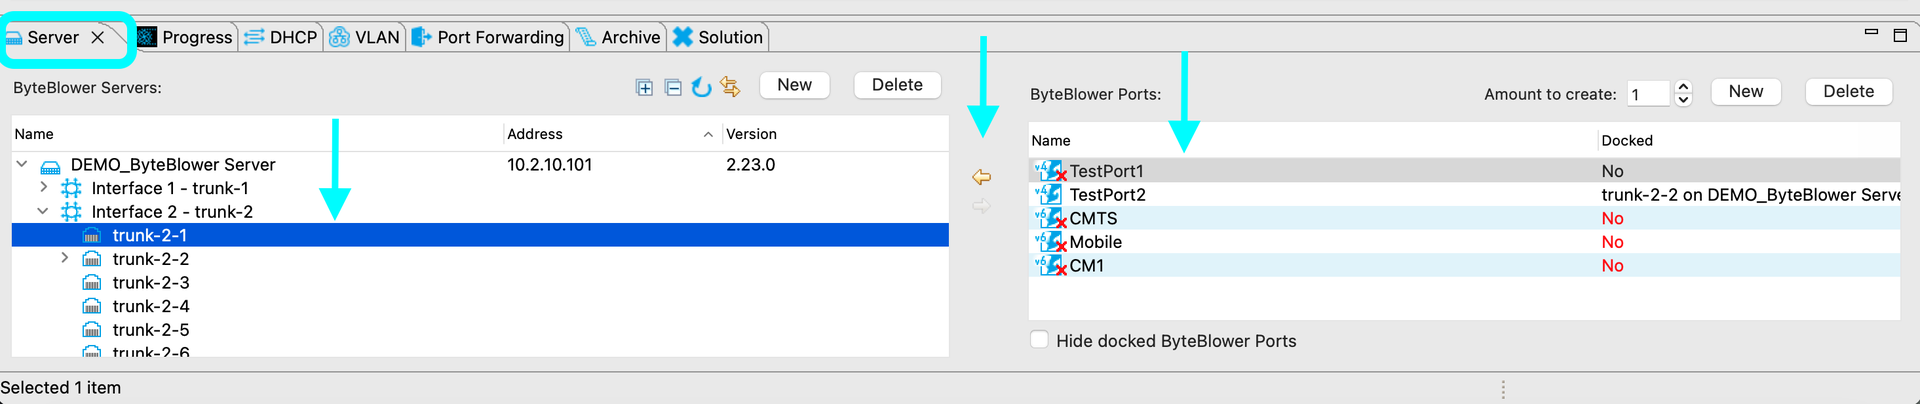
Docking the Ports | To Dock the ports means: to assign the physical interface on the ByteBlower system the port will send/receive the traffic through. Non- Trunk interfaces are the traffic interfaces that are directly connected to the server (usually the NSI side). Trunk Interfaces are related to an Excentis purchased switch, used to multiplex the traffic.
To Dock a port. In the Server tab, select the intended dock location on the server and also select the port you wish to dock, then press the yellow arrow key or drag and drop. |

| Run the test | Up to this point, there has been no real communication or connection with the ByteBlower server. Once we run the test, the server comes into the picture.
|


| Report | Once the test is complete, open the ByteBlower report to see how the test performed. You should see that 100% of the frames were received.
|
