Non-Trunk to Trunk Interface Configuration
| Introduction | Below details the steps on how to convert a Non-Trunk Traffic Interface on your BB5100 server to a Trunk Traffic Interface. |
Please Note | Important to note: your license must match the configuration applied to the Byteblower Server. It is always permissible by license to configure a Trunk interface into a Non-trunk interface. However, the amount of Trunk interfaces permitted is limited by the license purchased. For instance, if you purchased a license with one Trunk interface and one Non-Trunk interface, then you cannot configure 2 Trunking interfaces. The only other combination allowed will be of 2 Non-Trunks. |
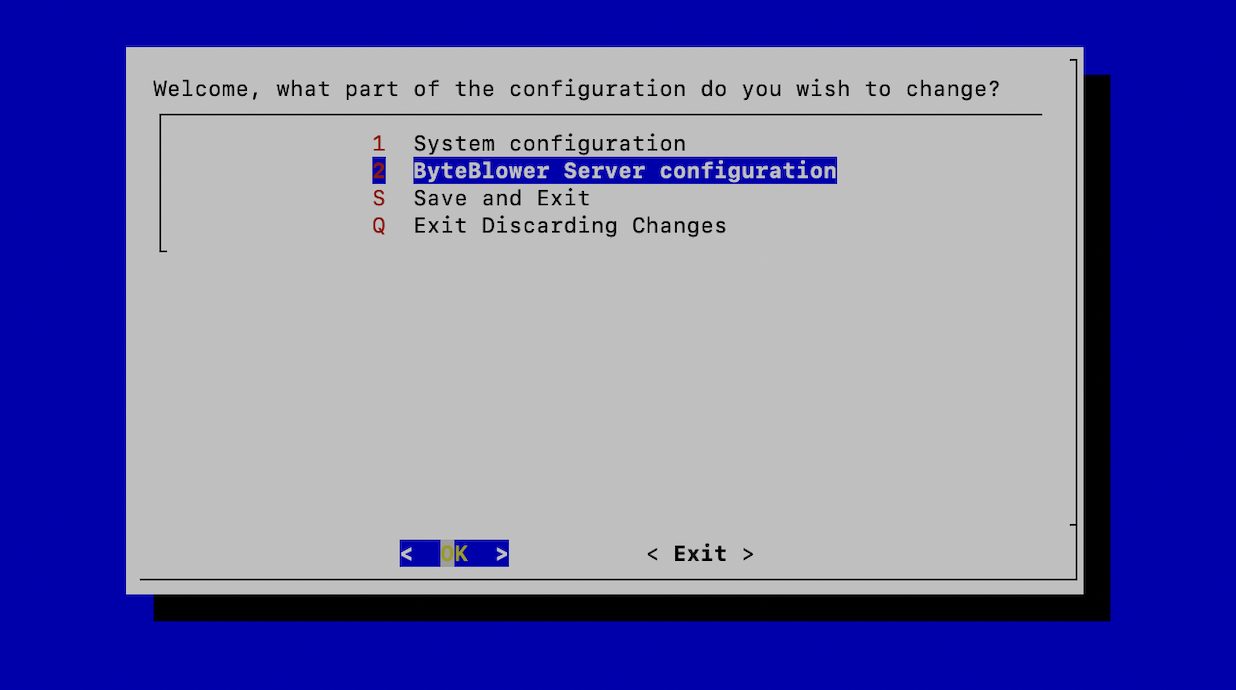
| Byteblower Configurator Tool | Login in to your Byteblower Server: root/excentis (This Example uses the BB5100 system). Next open the configuration tool on the server with the command below. byteblower-configurator Illustration:
|
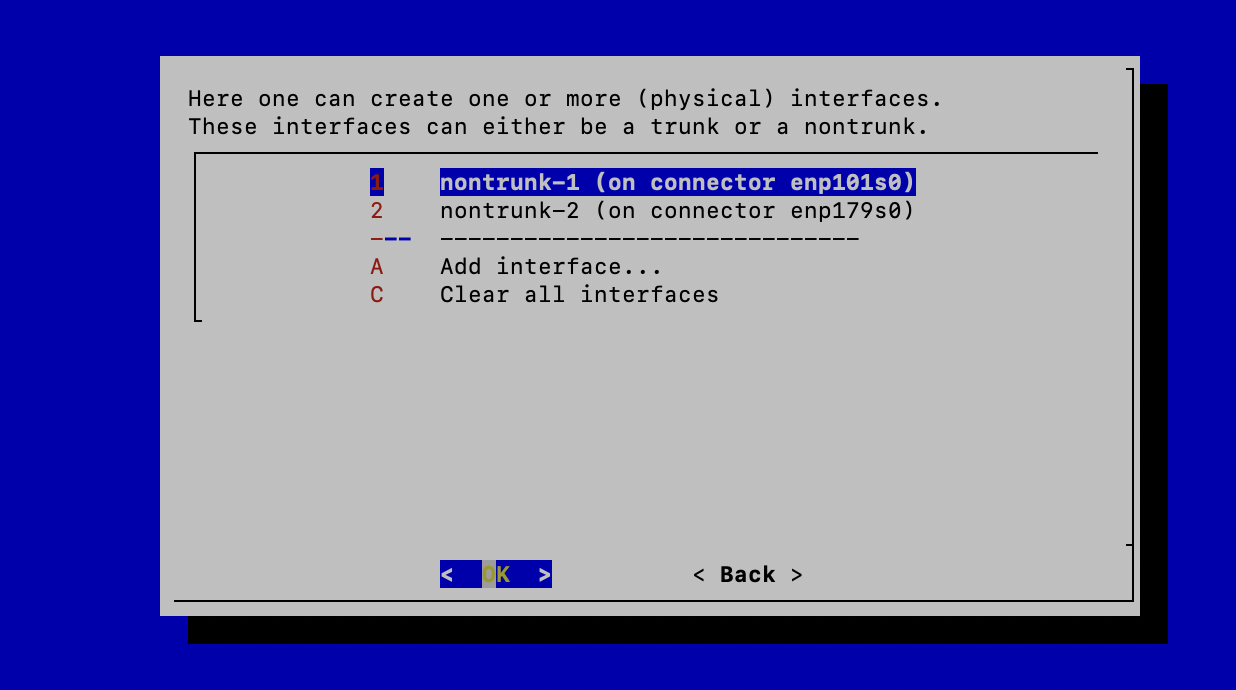
| Remove the Non-Trunk Interface | Go through the following steps. 1) Welcome, what part of the configuration do you wish to change? >>Byteblower Server Configuration 2) Please select and item and select OK >>Port configuration 3) Please select an interface to configure...>> Advanced. . . 4) Please select an interface to configure >> Interfaces . . . 5) Here one can create one or more (physical) interfaces. These interfaces can either be a trunk or a nontrunk. >>nontrunk-1 (on connector enp101s0) Illustration:
Note that the enp101s0 is associated with the bottom traffic interface on the server. The top traffic interface on the server is assigned to enp179s0. Makes sure to select the desired interface to work on. In this example we select enp101s0 (bottom connector) to configure as a trunk. 6) Interface nontrunk-1 is configured as a nontrunk interface. The maximum aggregated speed is limited to 100 Gbit/s. The interface has connector enp101s0 assigned. >> Remove this Interface |
| Add Trunk Interface | 1) Here you can create one or more (physical) interfaces. These interfaces can either be a trunk or a nontrunk. >>Add interface. . . 2) This wizard will guide you through the process to add an interface. This interface will be represented as a non trunk or trunk interface in the Byteblower API / GUI...>>Yes 3) Please select the type of interface to be created....>>Trunk 4) Please select an item and select OK>>enp101s0 5) A trunking interface has been created. Would you like to apply a preset?>>>No 6) Interface trunk-1 is configured as a trunk interface. The maximum aggregate speed is limited by the connector. The interface has connector enp101s0 assigned. >> Add logical interface(s). . . Illustration:
Here you can configure your Trunking Interface |
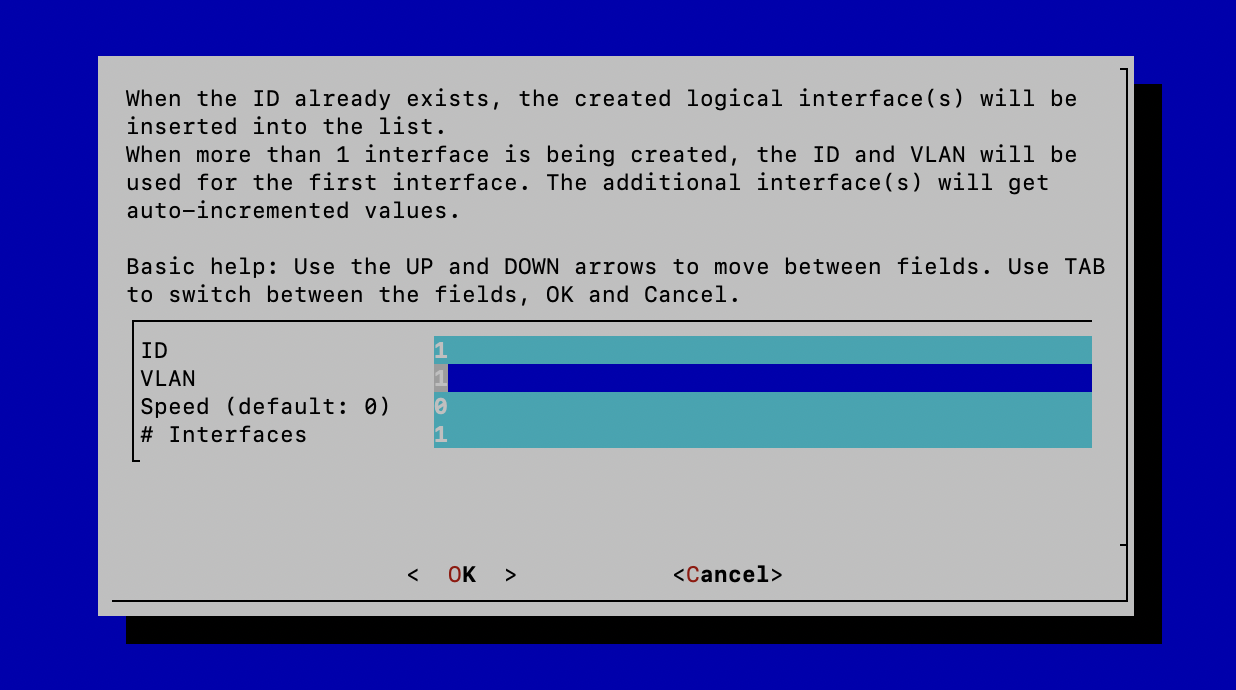
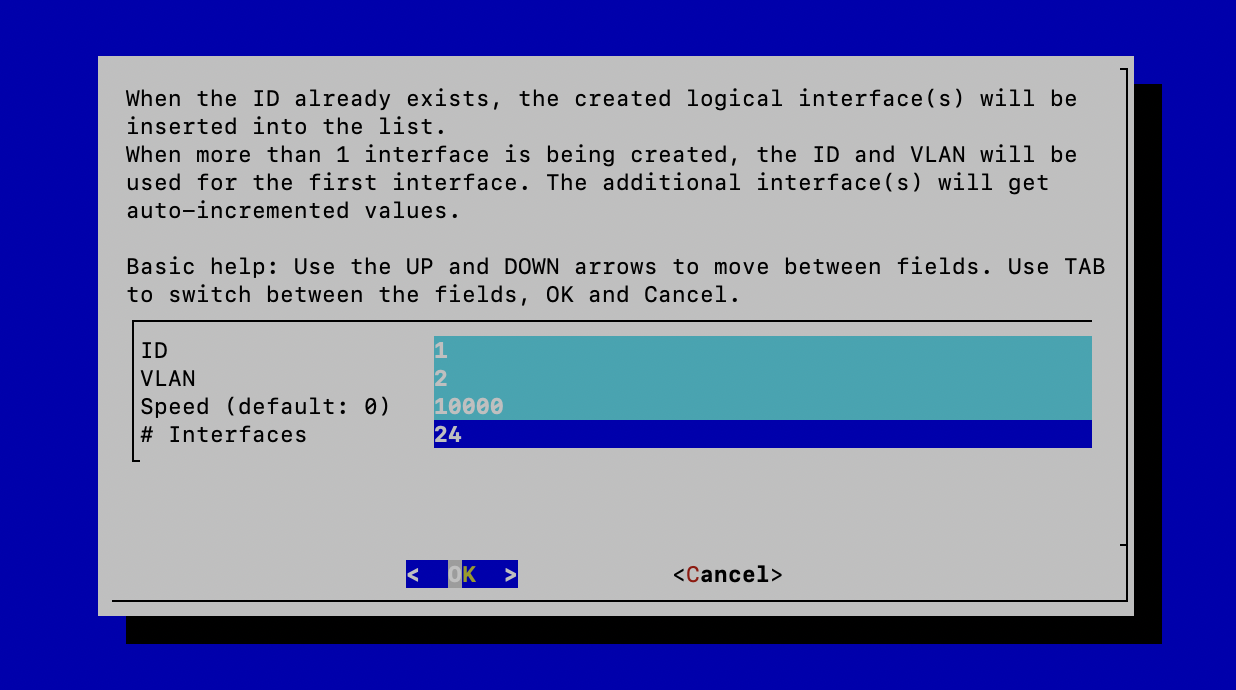
| Configure Trunk Interface | 1) Next fill in this table according to your setup. ID: >> 1 This is the Trunk ID. You must add your Trunks in ascending numerical order based on how you want them to appear on the GUI. These are logical interfaces so you do have the ability to split a switch into multiple trunks (you must know the VLAN mapping in the config files of the switches) For simplicity we will only consider one switch and one trunk for this switch. VLAN: >> 2 This is where the VLAN sequence starts, corresponding to the VLAN series in this trunk interface. Speed: >> 10000 This is the standard configured speed for nbase-t ports and 10g ports # Interfaces >> 24 The number here indicates how many interfaces are part of this trunk. It also assigns each logical port the next VLAN starting with the one configured above. So this Trunk-1 will have VLANS 2-25 Illustration:
Press Tab button on your keyboard to access the Ok button 2) Please select an item and press OK >> enp101s0 3) 24 logical interfaces will be created on trunk-1 starting with ID-1, VLAN 2. The speed will be limited to 10000 Mbits/s. The interface will use connector enp101s0. Are you sure? >> Yes 4) Review config>> Back 5) Repeat this step if more Trunks are intended and permitted by license. |
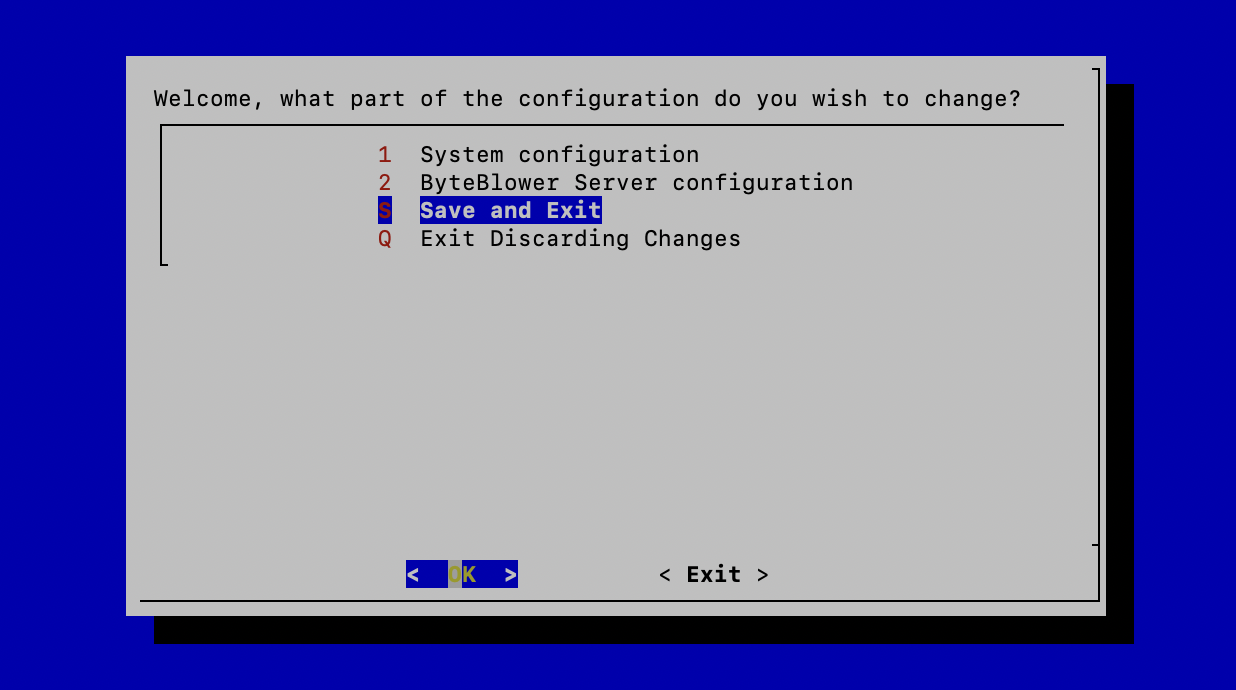
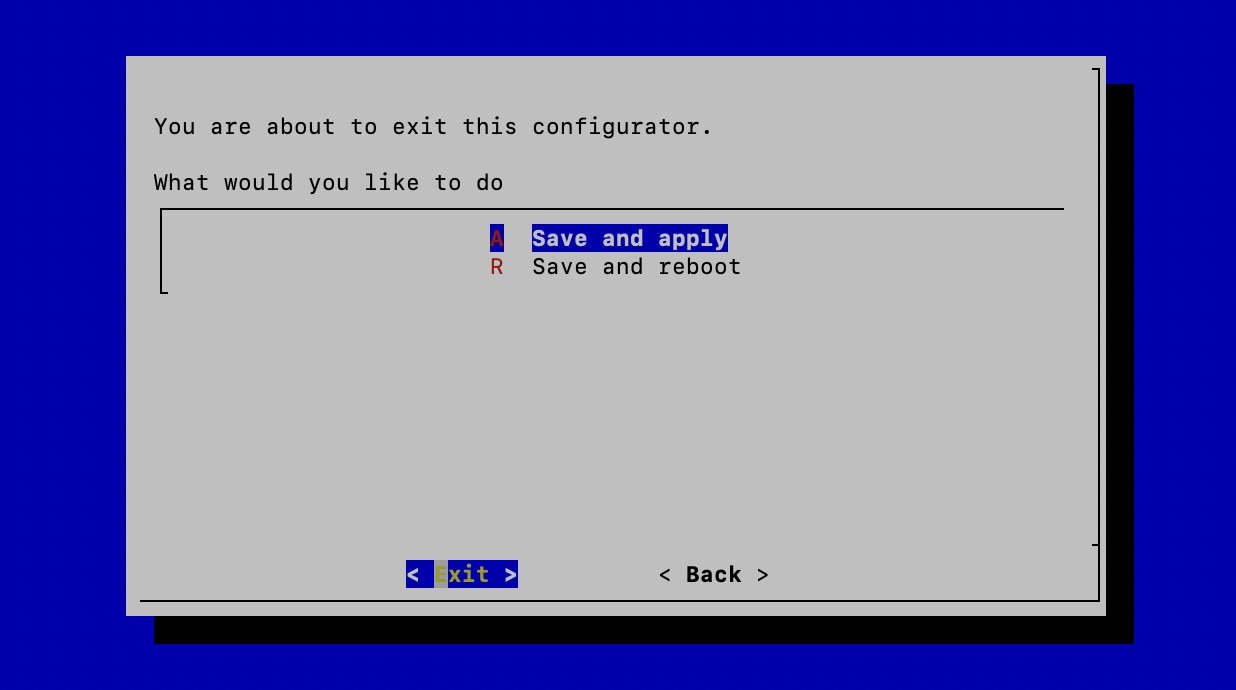
| Save and Apply | Once your desired trunking interface(s) have been added, continue selecting the Back option until you reach this screens below. You will have now added new trunk(s) and can save your changes. Illustration:
>>Select and Exit
>>Save and Apply |
